
The Ultimate Brunch Side
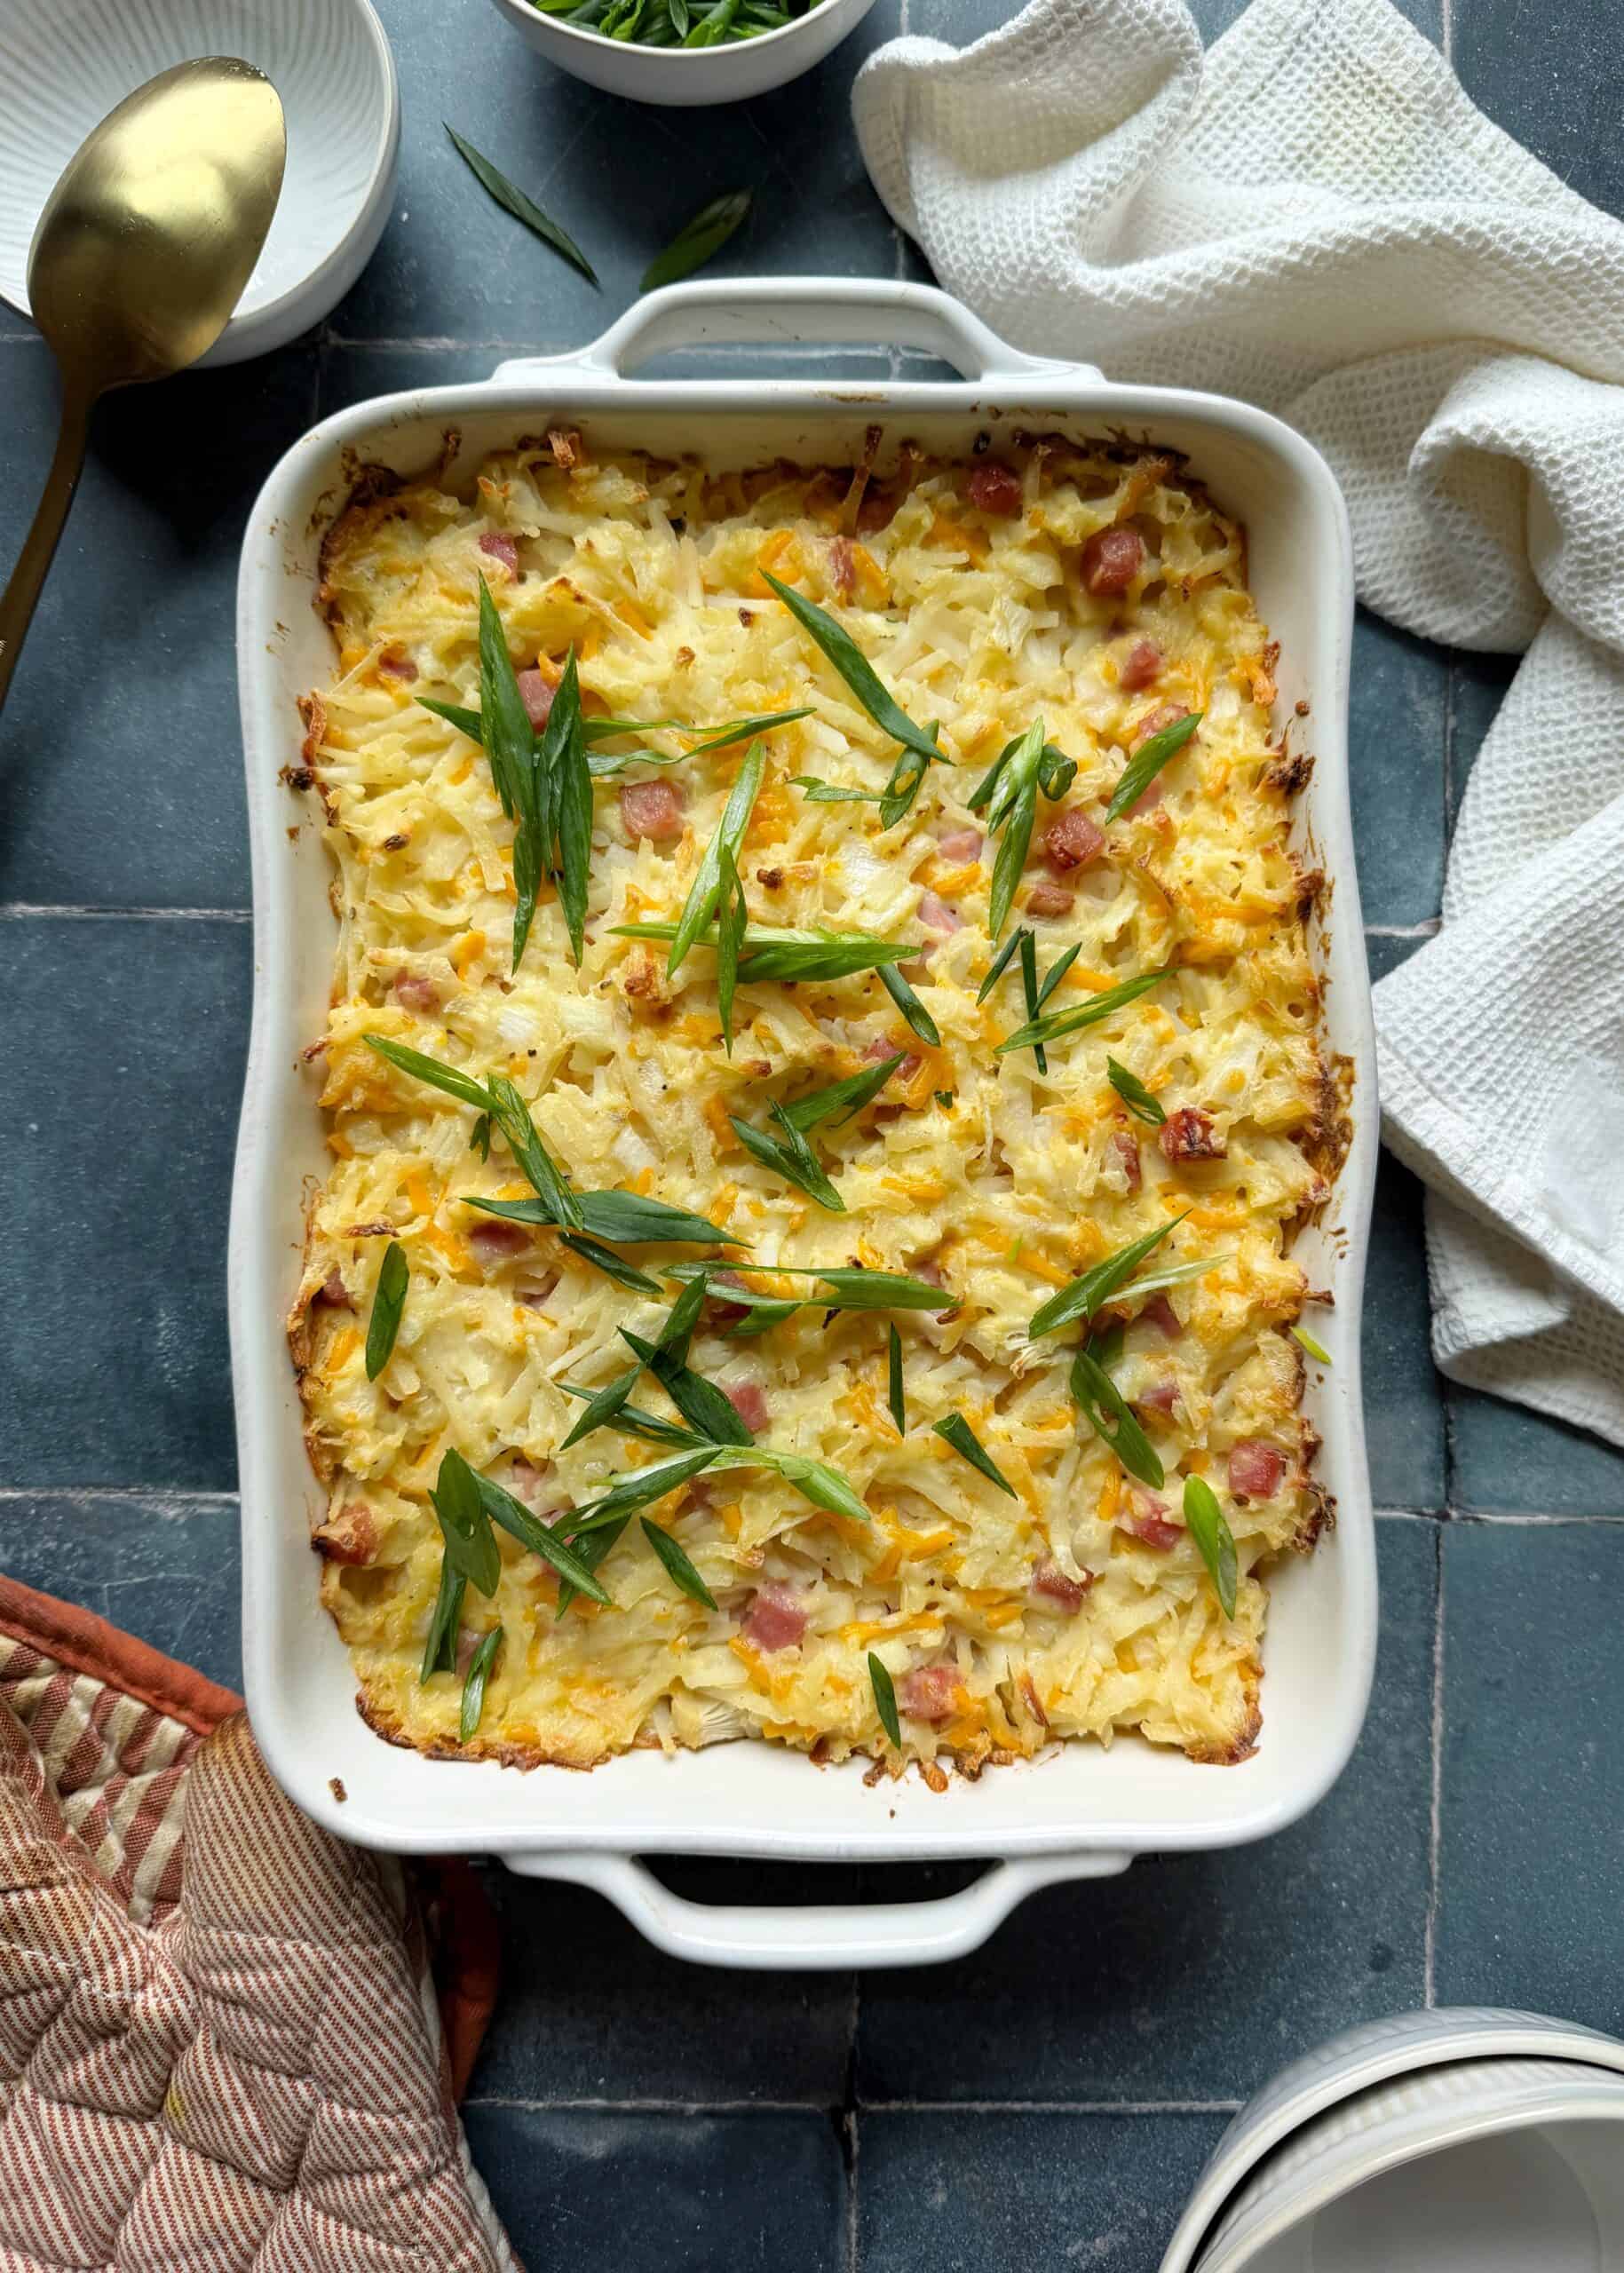
This ham and cheese hash brown casserole recipe is pure, midwestern nostalgia. Nothing beats a side of cheesy hashbrowns for Sunday brunch. And this recipe is so good it could be eaten as the main! It’s a savory dish packed full of cheesy goodness, smoky ham, and subtle seasonings that make a huge impact.
I grew up loving a side of cheesy hashbrowns. It’s a staple at Midwest breakfasts and lunches and was always the first dish I’d go to. This is my take on that recipe I adore. Its base is rooted in classic small town cooking. Simple ingredients that pack huge flavors. Sharp cheddar cheese, smoky ham, and the cream of chicken soup instantly adds a deeply savory flavor with minimal effort. This recipe is approachable by nature, making it a great side to volunteer to bring to your next midday get together.
The Supplies
Ingredients
To make this ham and cheese hash brown casserole recipe, you’ll need the following ingredients:
- Shredded cheddar cheese
- Shredded swiss cheese
- Canned cream of chicken soup
- Finely chopped yellow onion
- Sour cream
- Unsalted butter
- Fine kosher salt
- Garlic powder
- Black pepper
- Mustard powder
- Boneless ham steak, cubed
- Frozen hash browns
- Sliced green onions
For the exact ingredient amounts, check out the recipe card at the bottom of this page.
Equipment
In order to make this ham and cheese hash brown casserole, you’ll need the following pieces of equipment:
- Cutting board and knife
- Measuring cups
- Measuring spoons
- Large mixing bowl
- Cheese grater
- 9×13 casserole dish
- Silicone spatula

Frequent Recipe Questions
Can I make this recipe in advance?
- A: Absolutely! Prepare the casserole and then wrap the unbaked casserole dish with plastic wrap. Refrigerate the casserole dish for up to 3 days before baking and serving it.
Is it possible to make this recipe gluten free?
- A: Yes! Many brands of canned soup offer a gluten free version of cream of chicken soup. To make this recipe gluten free, swap the cream of chicken soup for the gluten free option.
Recipe Tips
When you make this ham and cheese hash brown casserole, here are a few tips to make sure it turns out delicious:
- When folding in the hash browns, I like to work in batches. Add in a third or half of the hashbrowns and fold to combine them into the cheese mixture. Then, add the remaining half of the hashbrowns to the mixing bowl and stir to combine.
- Your grocery store may offer multiple types of ham steaks, such as honey baked or smoked. Opt for the flavor profile you’d like the best on its own! I love the sweetness of the honey baked ham steak. But, a smoked ham steak would pair with this recipe as well.
- Make sure to use a sharp knife when chopping the onion. A sharp knife may seem intimidating for a newer home cook, but it’s actually much safer than using a dull knife. Especially on an onion where the knife can easily slip. My favorite knife for chopping onions is a hollow-edge Santoku knife. The flat edge and dents make it really easy to slice through the onion seamlessly.
Recipe Details
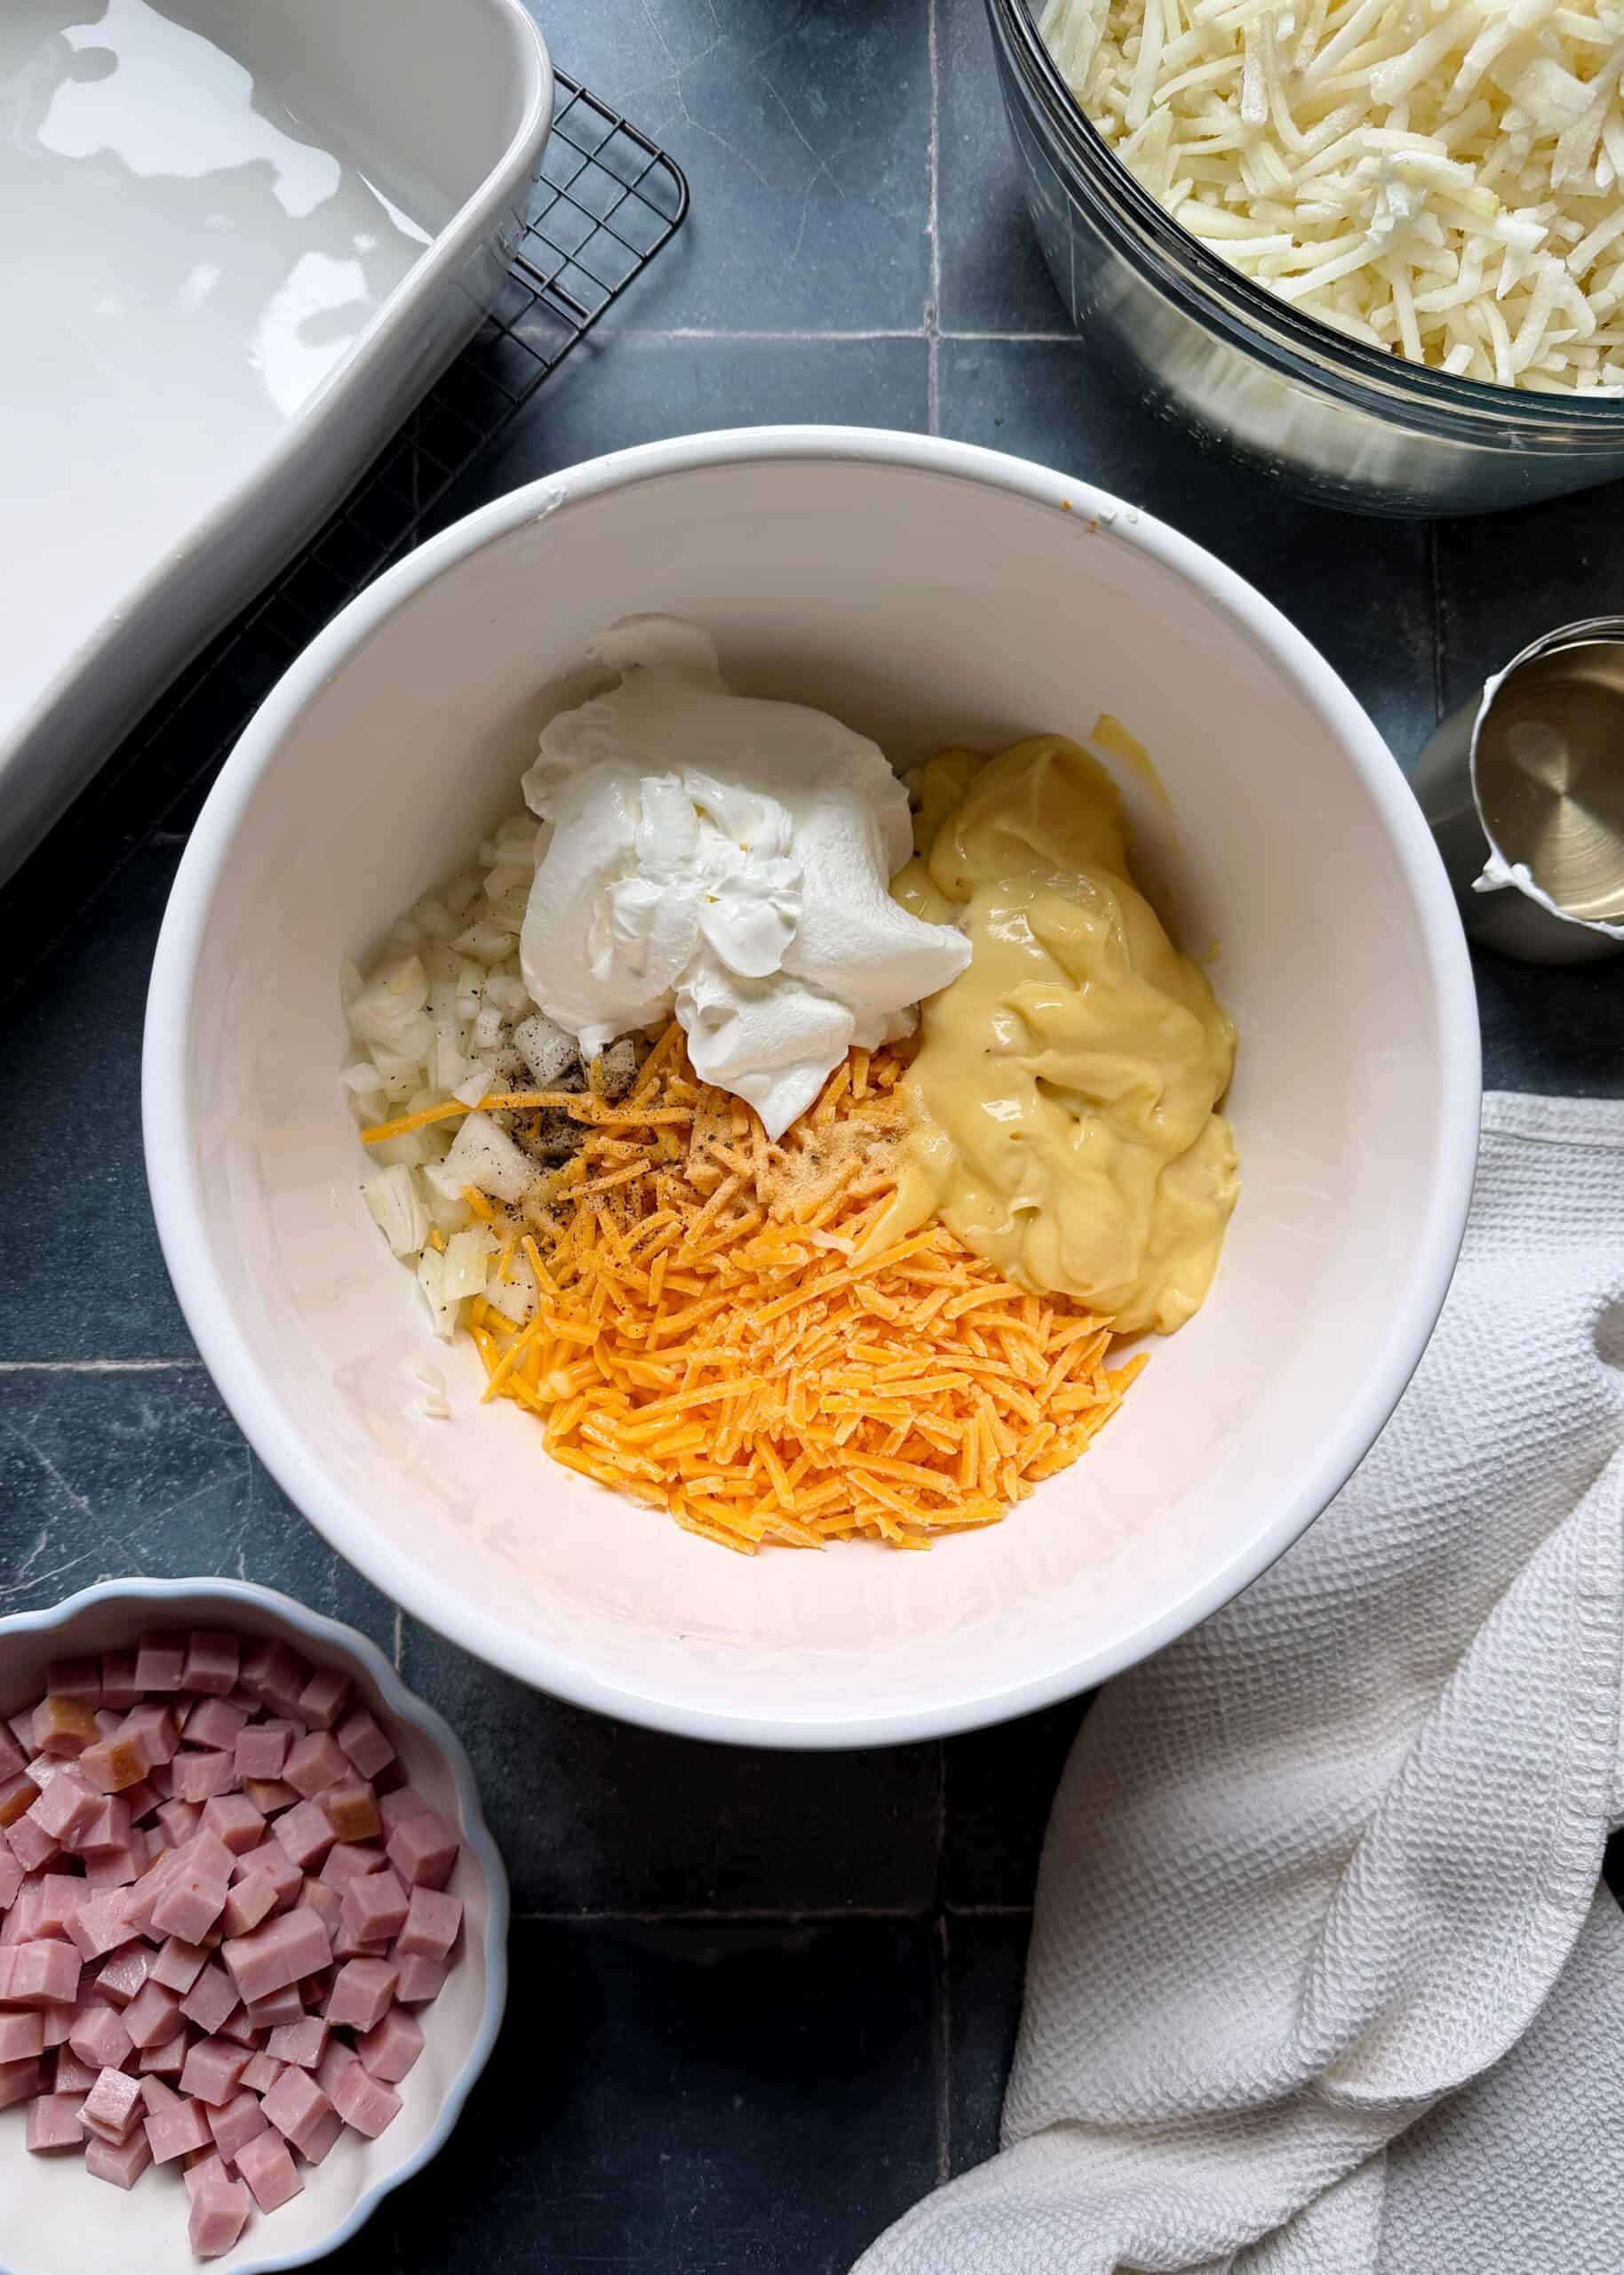
To get this recipe started, you’ll first turn the oven on to 350°F and get out a 9×13 casserole dish. Next, get out a large mixing bowl and add the shredded swiss cheese, shredded cheddar cheese, cream of chicken soup, chopped onion, sour cream, melted butter, garlic powder, salt, pepper, and mustard powder. Use a silicone spatula or wooden spoon to mix everything together, until the soup and sour cream have blended into one.
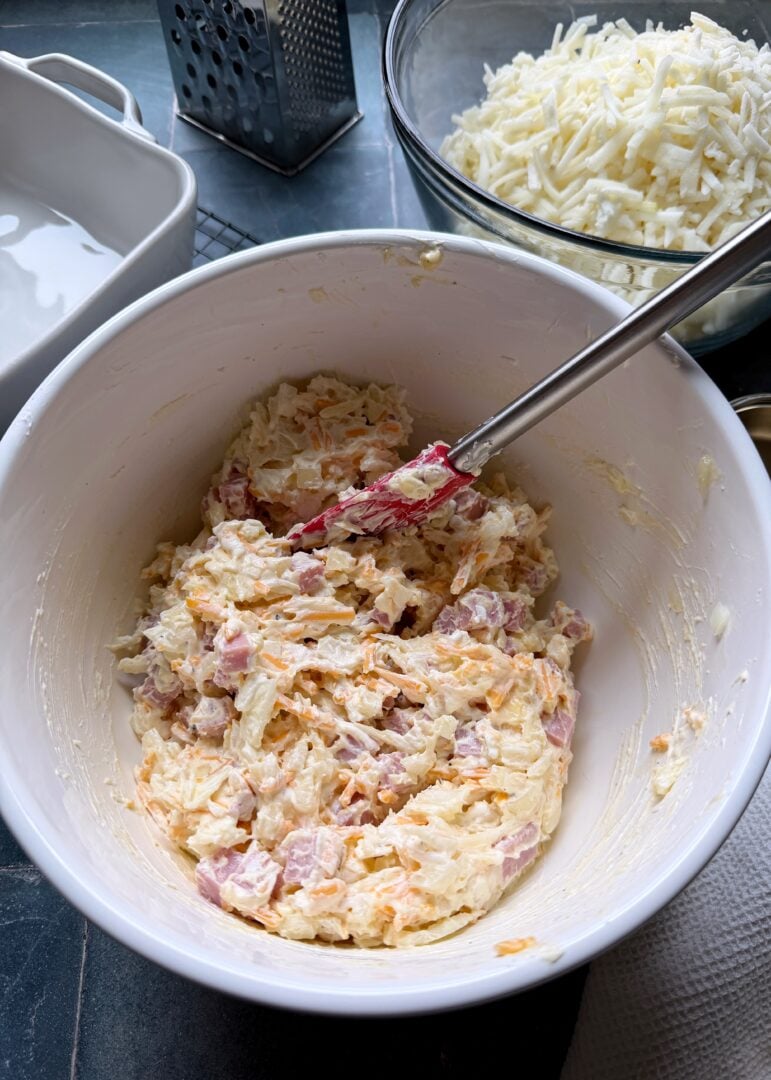
Add the cubed ham steak to the cheese mixture and stir to incorporate the ham fully. From there, fold in the thawed hash browns, working in batches if needed. Once the hash browns are coated in the cheese mixture, transfer them to the casserole dish. Use a silicone spatula to spread the hash browns into an even layer.
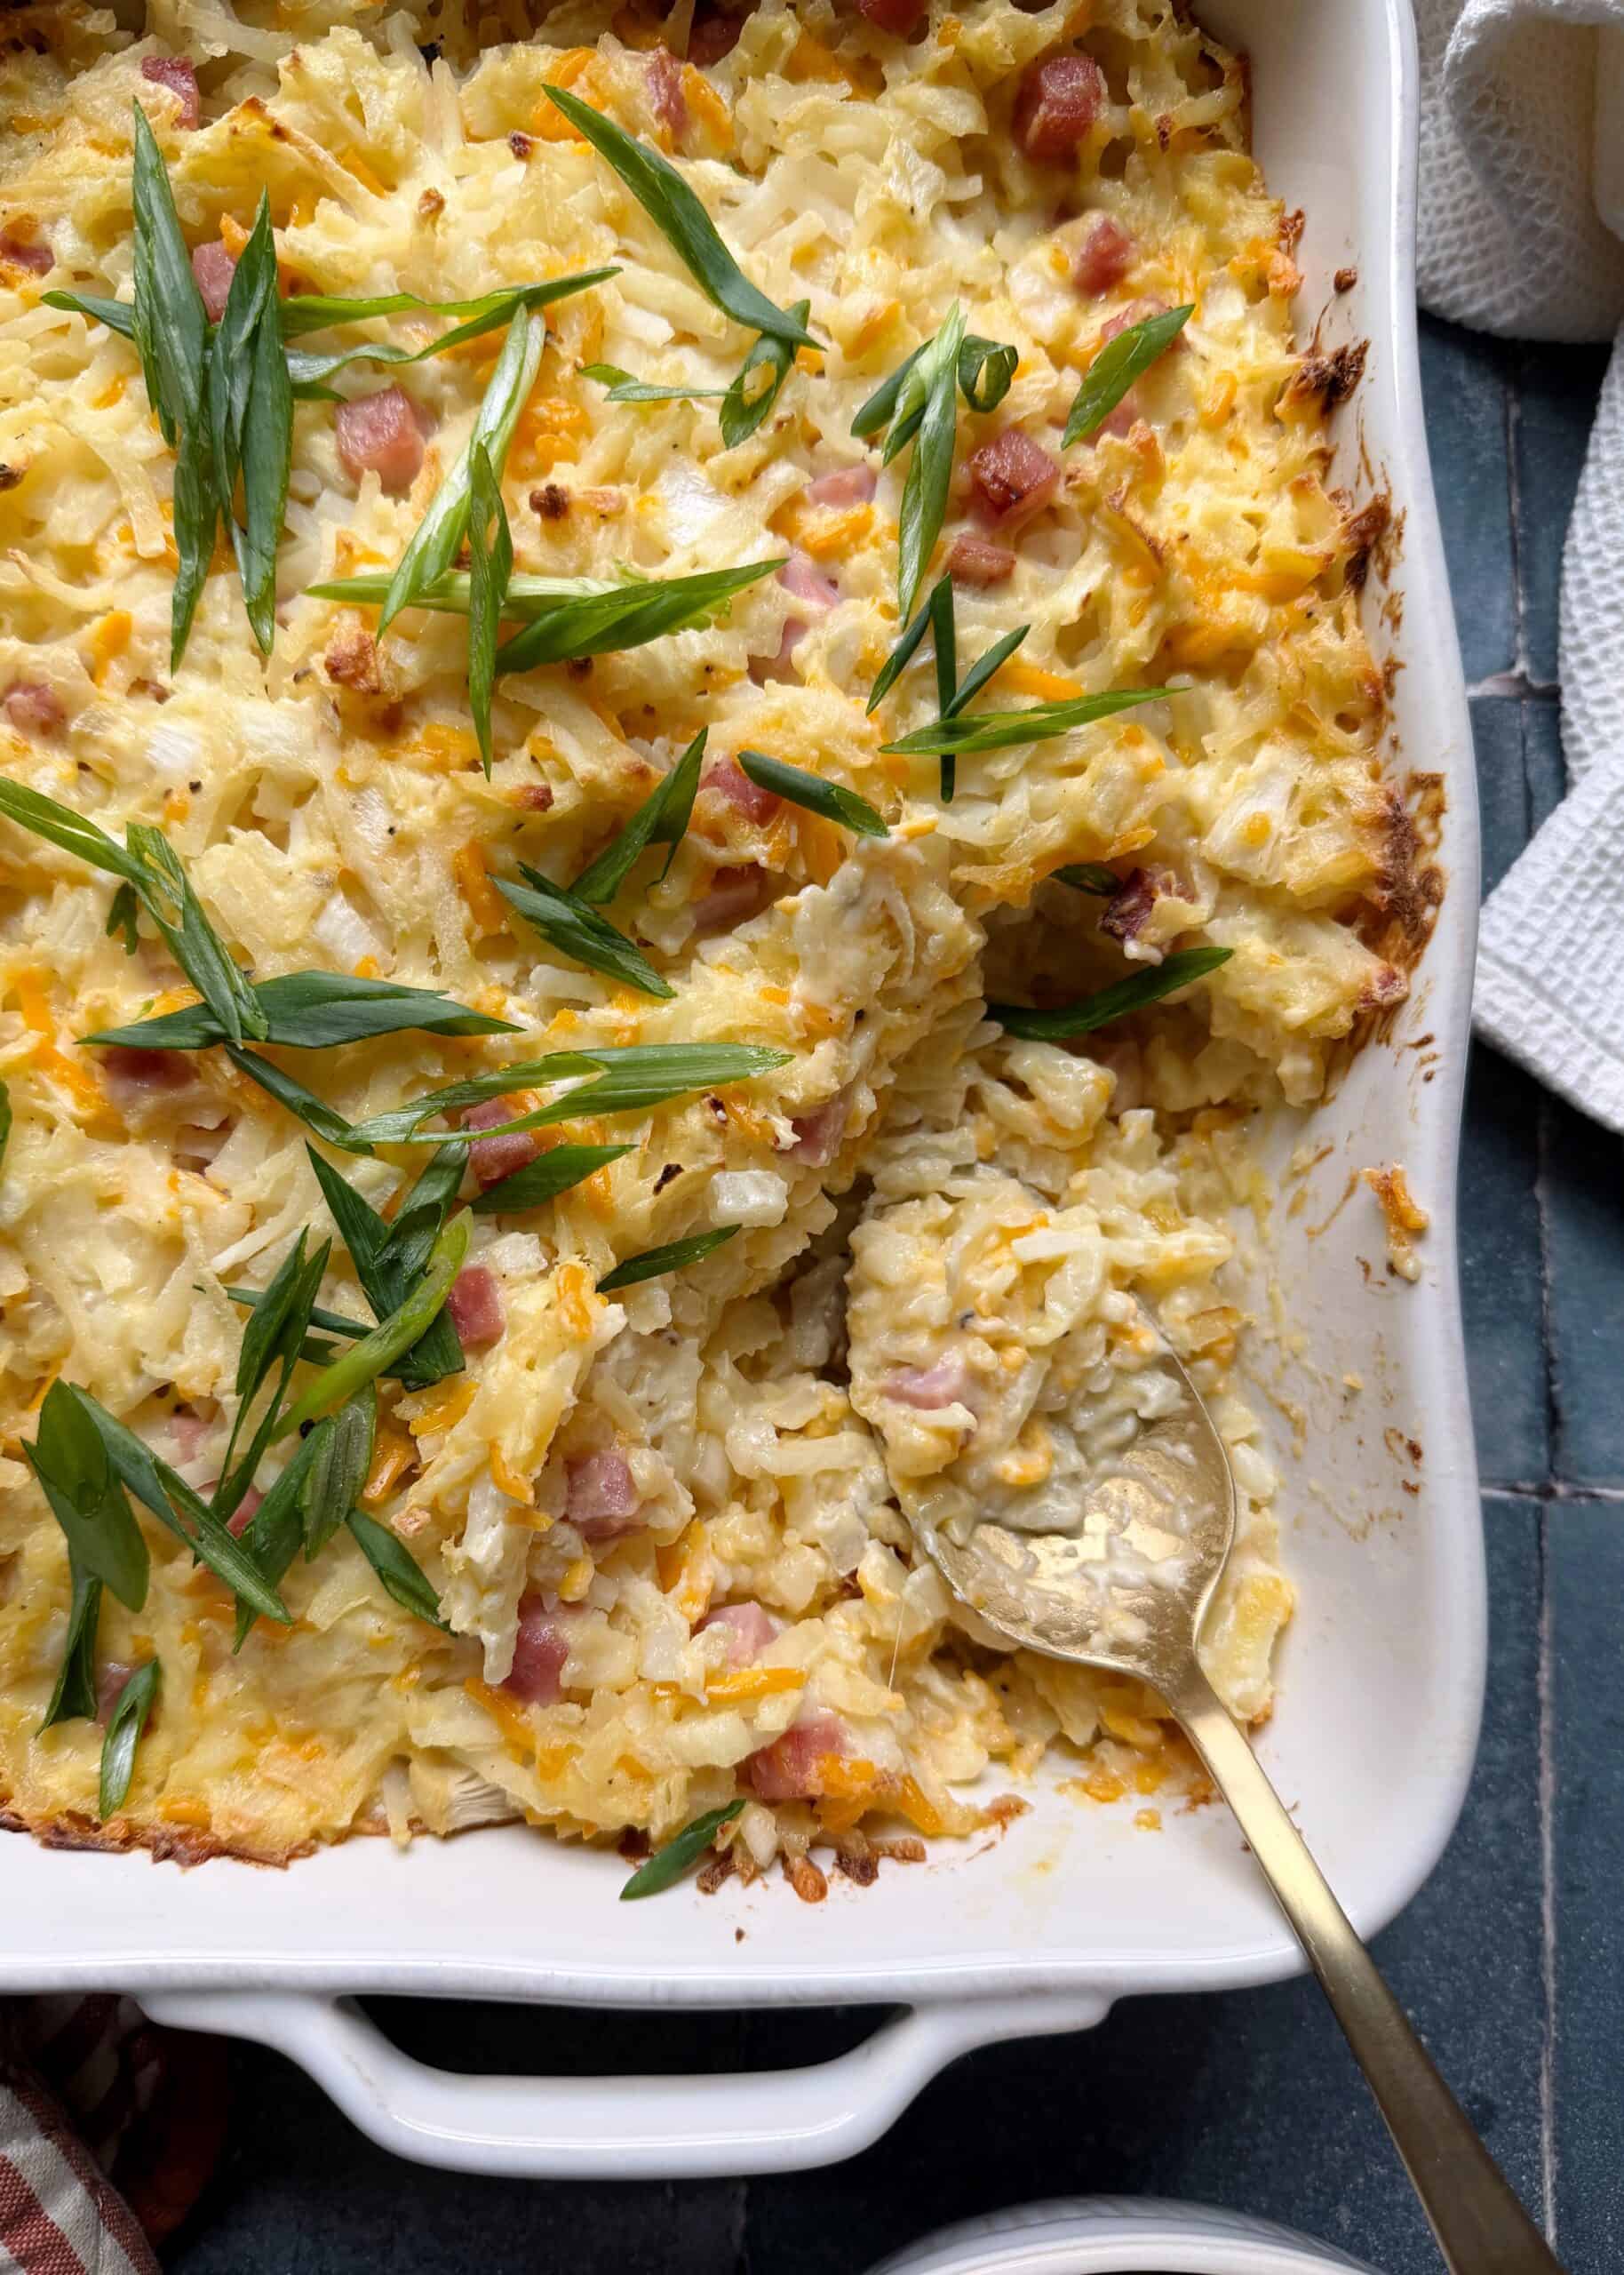
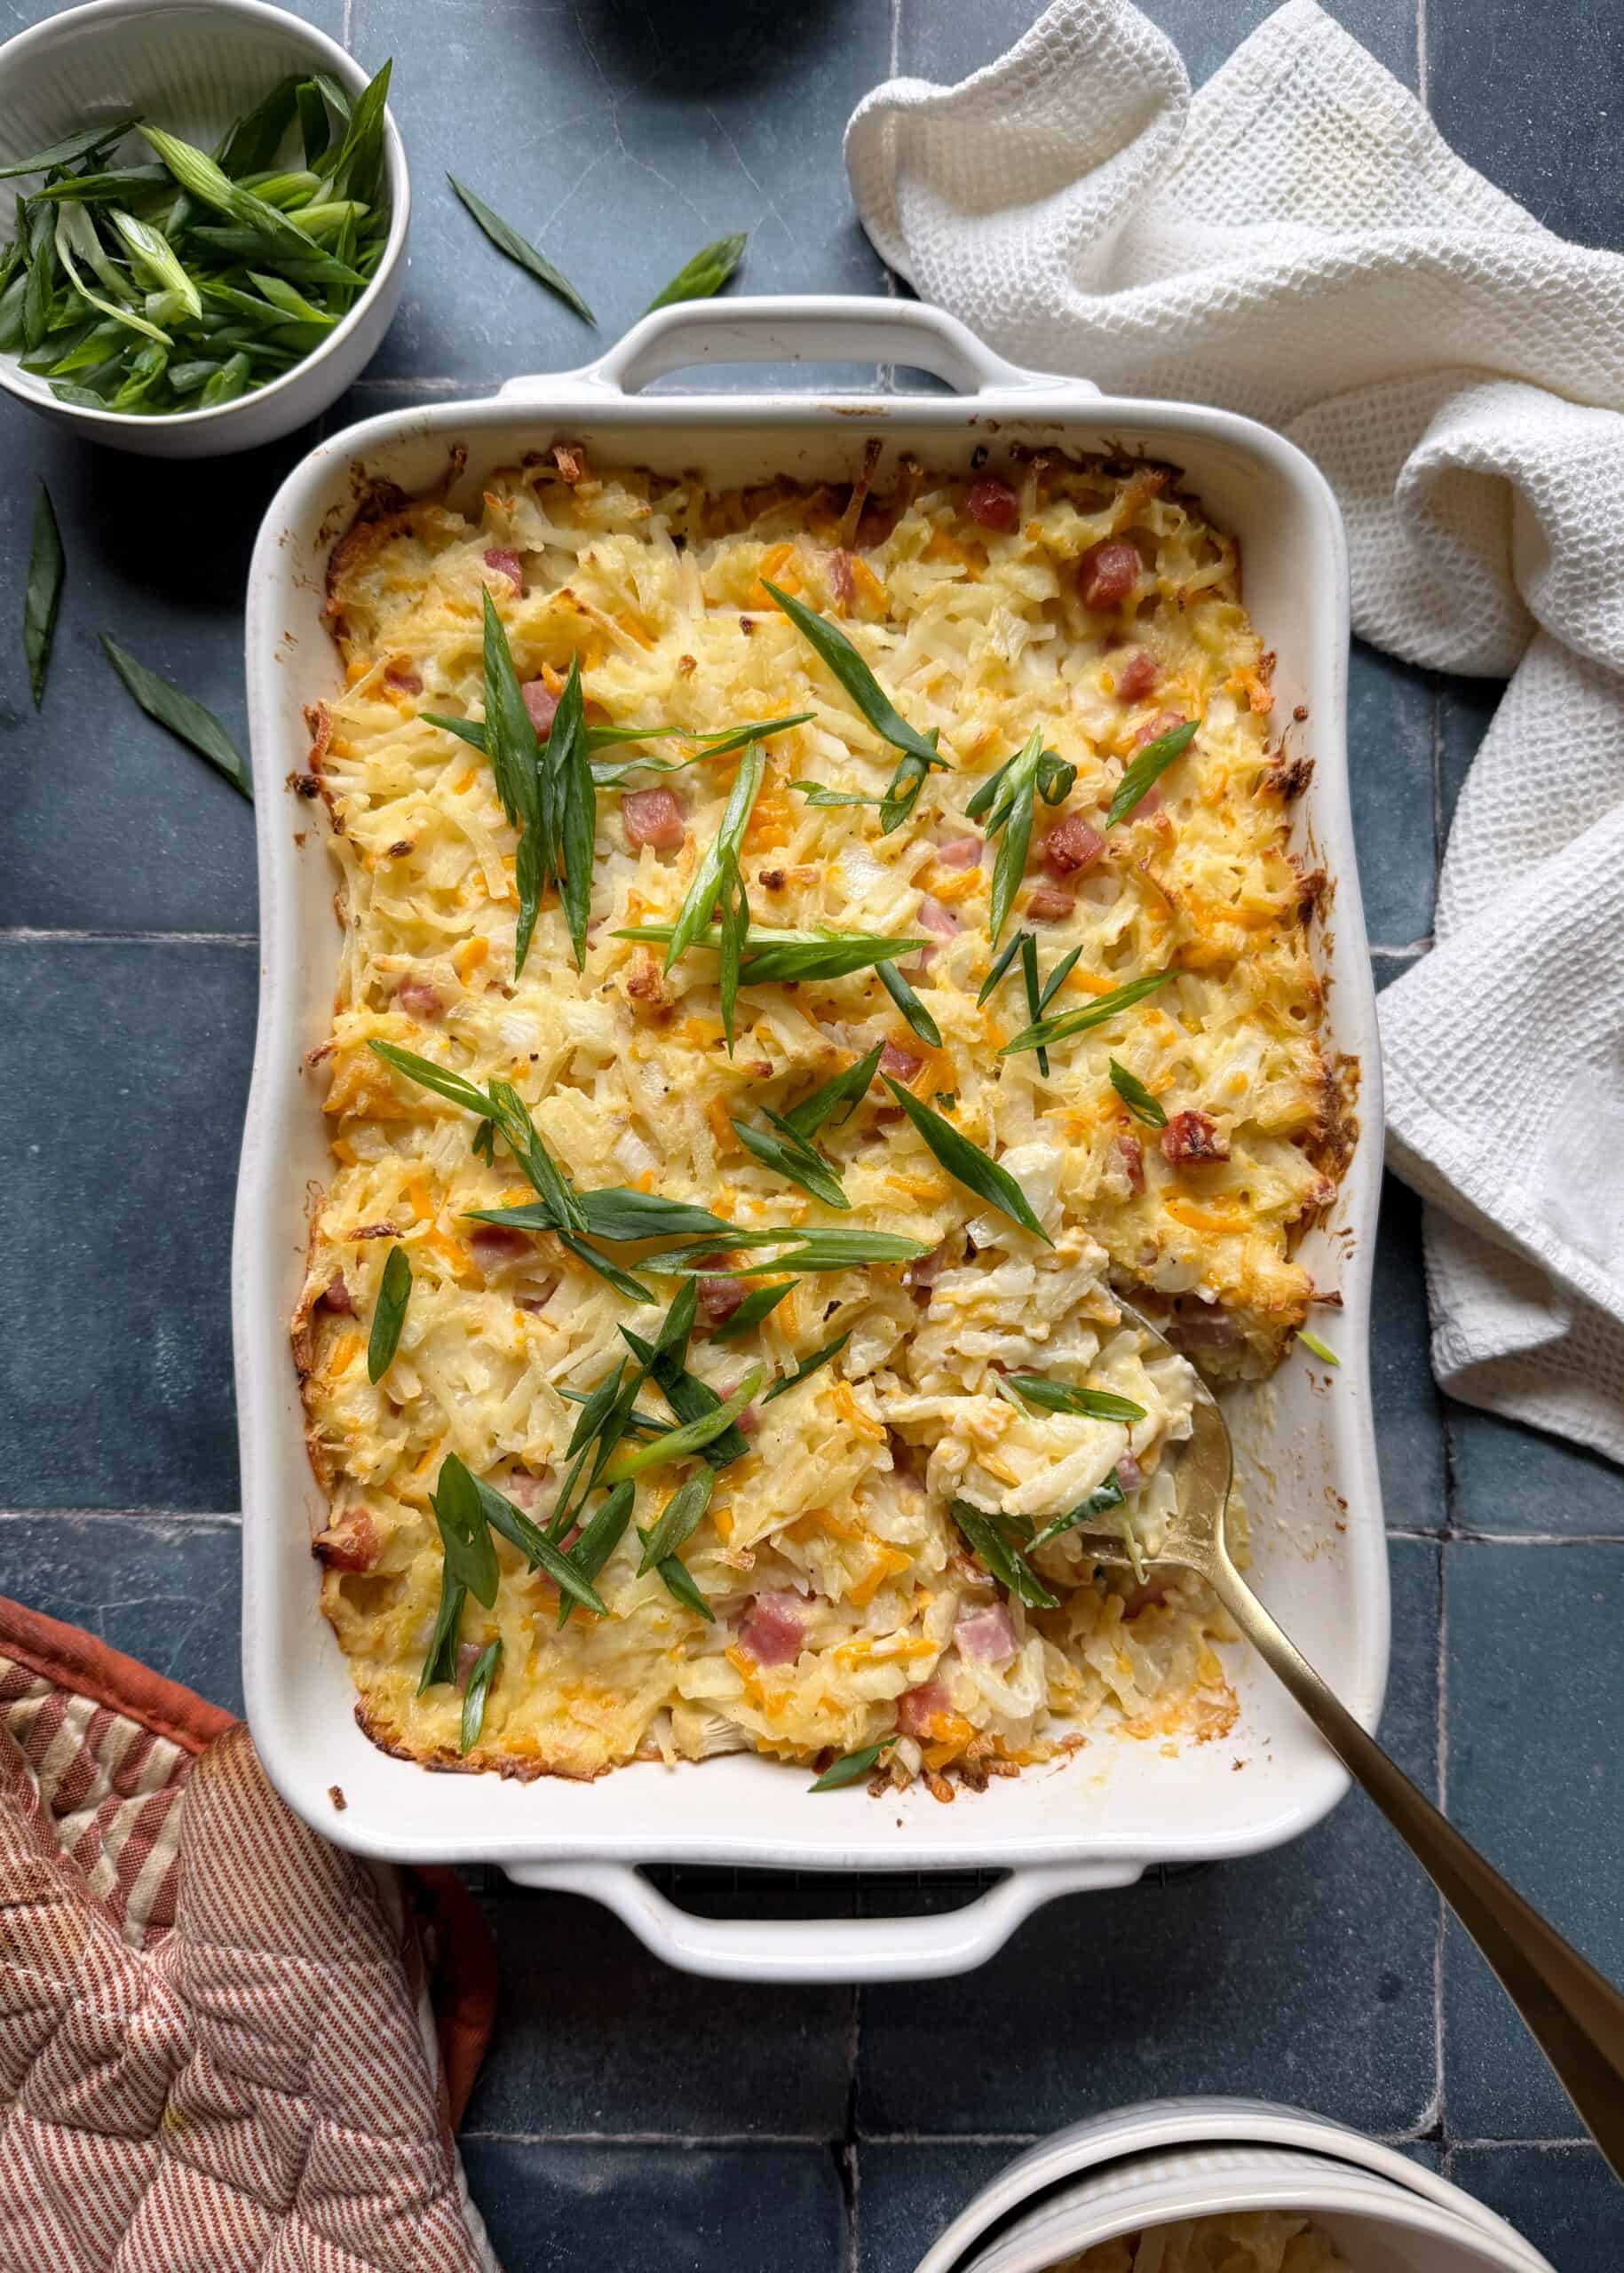
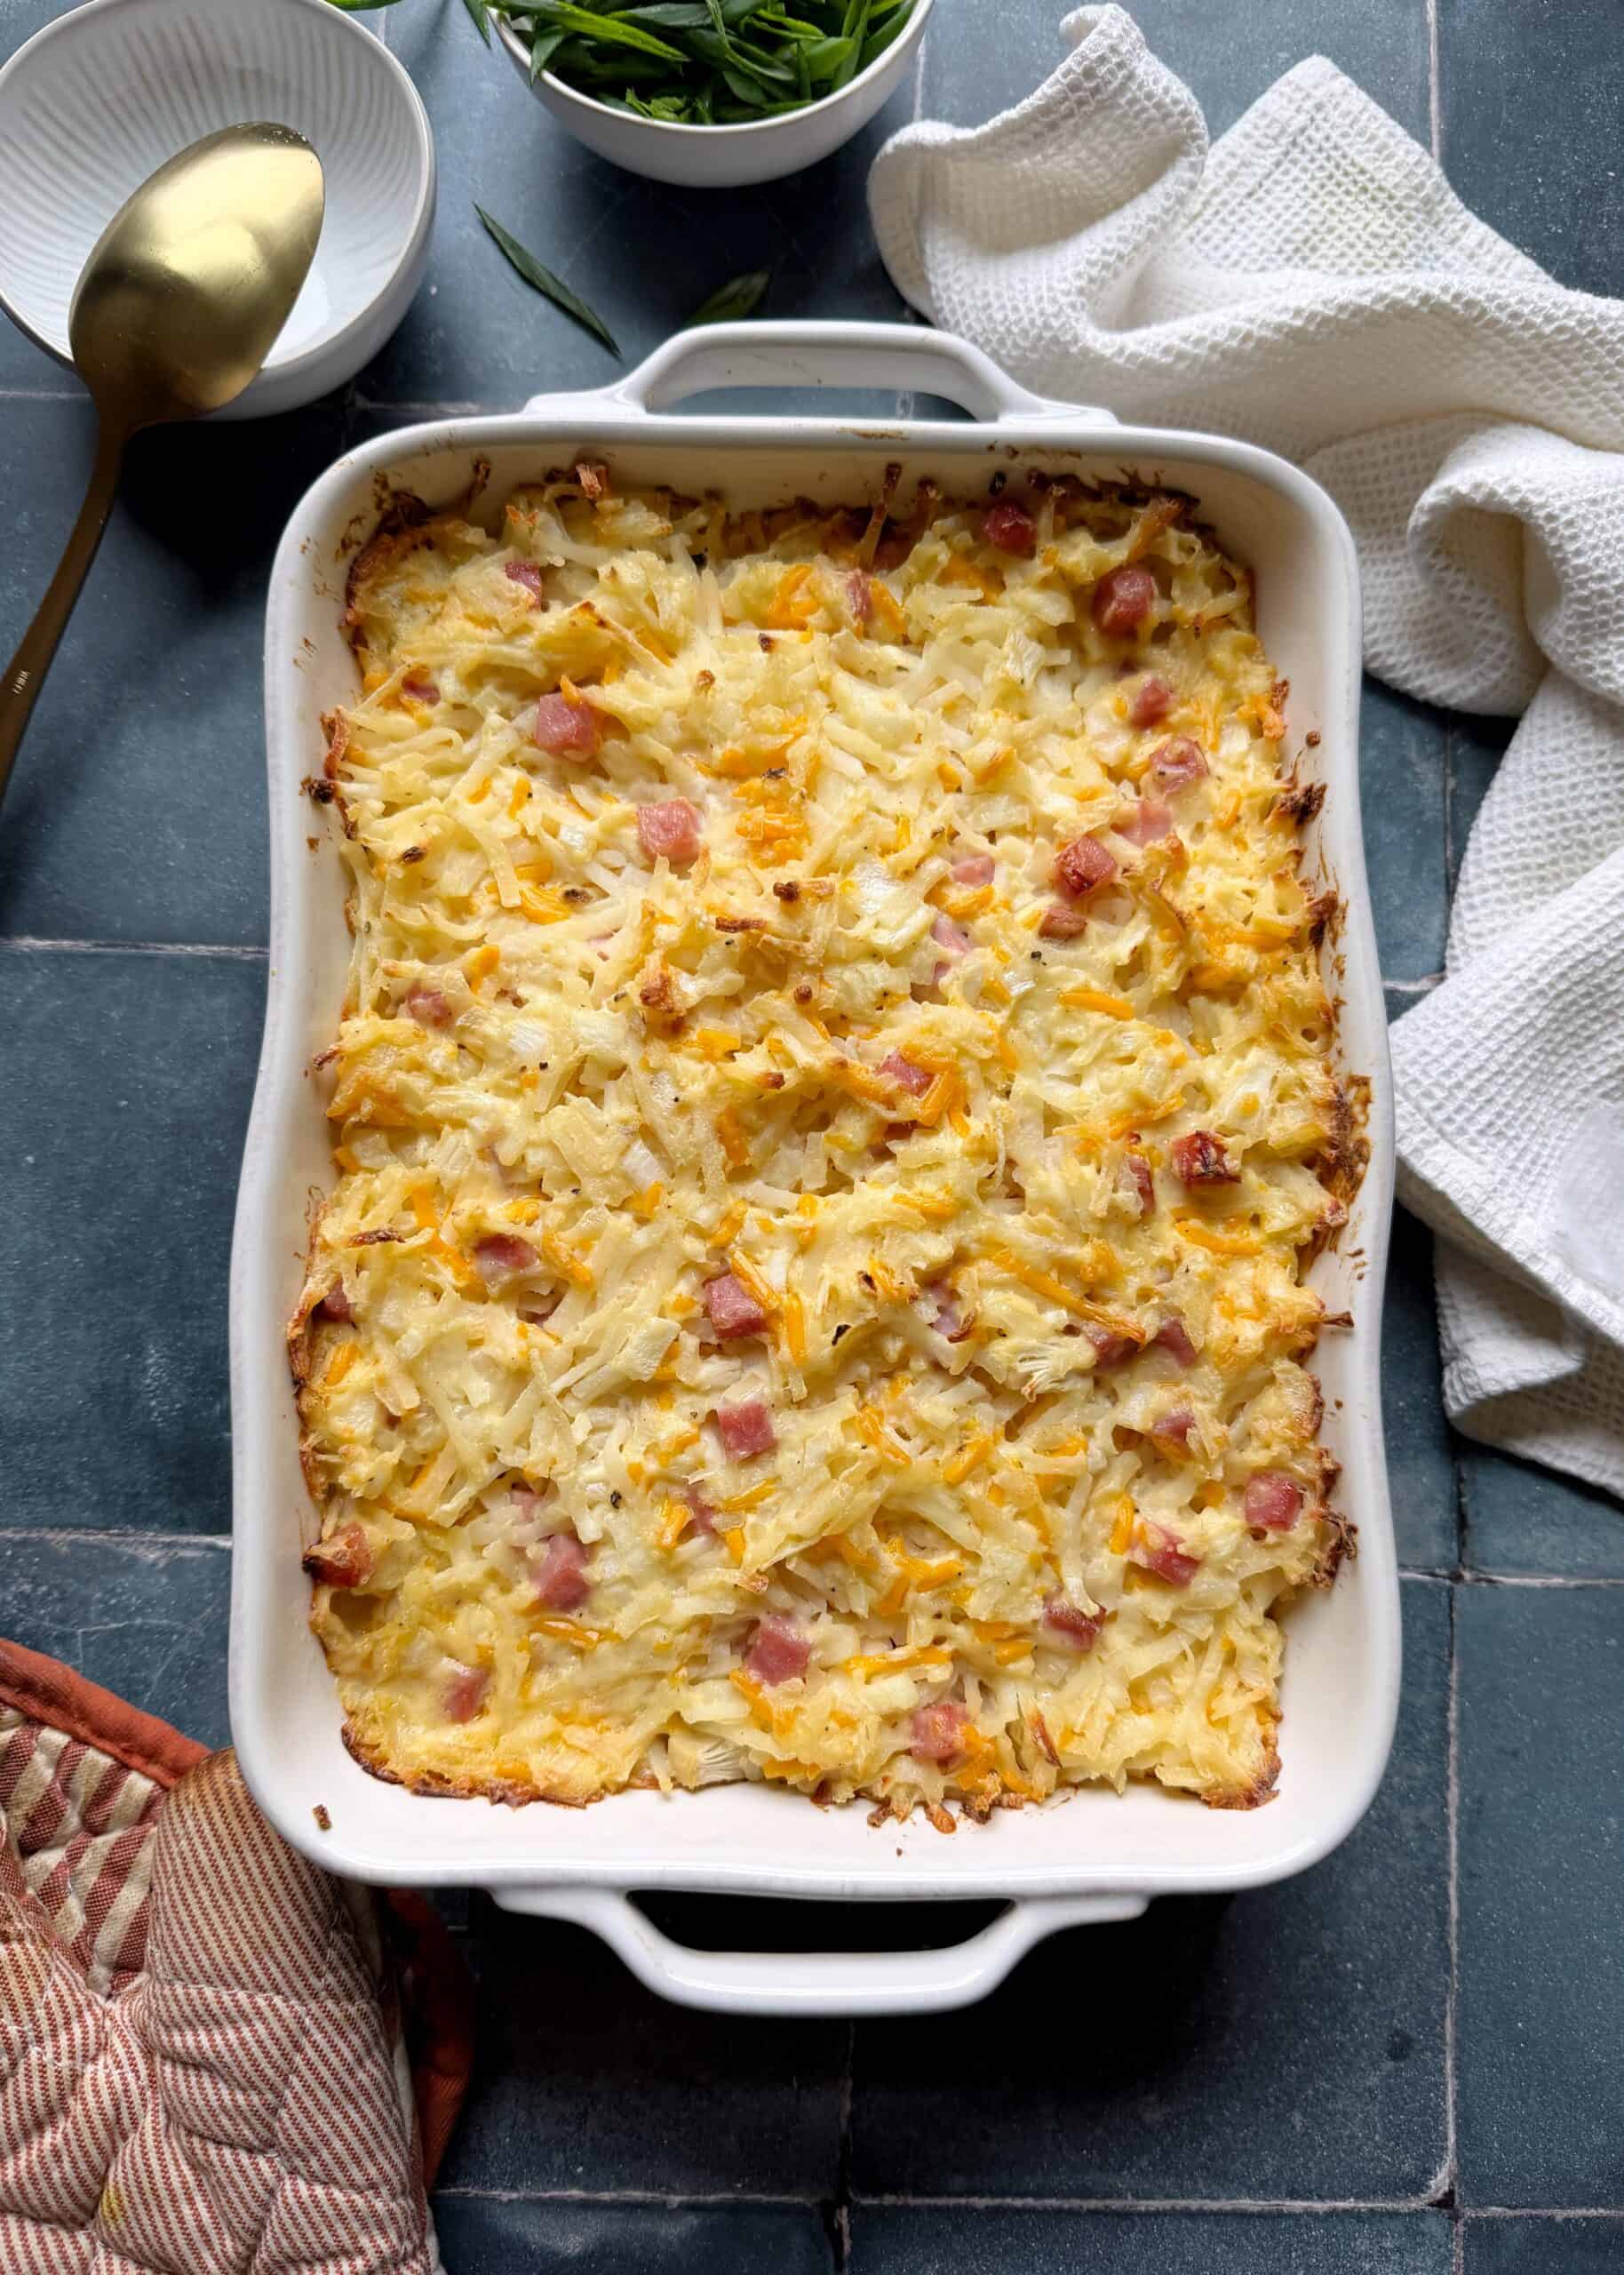
Bake the ham and cheese hash brown casserole in the oven for about an hour. The casserole should be melty in the middle and just starting to brown along the edges. Let the casserole cool for a few minutes before serving and then top with sliced green onions for a bit of fresh crunch. Enjoy right away warm!
Breakfast casseroles are always a hit. Be sure to check out these other casserole recipes:


If you make this ham and cheese hash brown casserole, be sure to leave a comment or give this recipe a rating – I can’t wait to hear how it goes. As always, tag me on Instagram, TikTok, or Facebook in your photos. It makes me feel like we’re getting to cook together!This post may contain affiliate links, please see the privacy policy for details.
Cheesy Ham and Hash Brown Casserole
Description
Savory ham and cheese hash brown casserole with cheddar and swiss cheeses, diced ham steak, and topped with fresh green onions.
Ingredients
Instructions
-
Preheat the oven to 350°F and set out a 9x13 casserole dish.
-
In a large mixing bowl, add the shredded swiss cheese, shredded cheddar cheese, cream of chicken soup, chopped onion, sour cream, melted butter, garlic powder, salt, pepper, and mustard powder. Stir to mix everything together.
-
Add the diced ham steak to the mixing bowl and stir to coat the ham pieces in the cheese mixture.
-
Fold the thawed hash browns into the cheese mixture, ensuring the hashbrowns are completely coated in the cheese mixture.
-
Transfer the cheesy hashbrowns to the casserole dish and use a silicone spatula to spread them into an even layer.
-
Bake the ham and cheese hash brown casserole in the oven for 1 hour, until the edges just begin to corn. Once out of the oven, let the casserole cool for about 5 minutes.
-
Garnish with thinly sliced greens and serve warm. Enjoy!